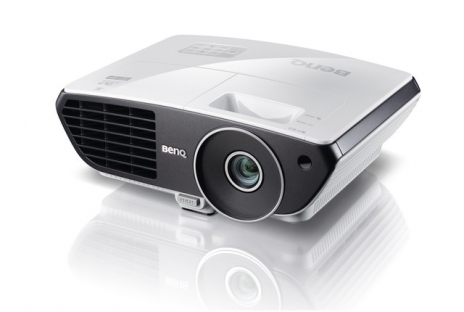
So I decided my TV wasn’t cutting the mustard. I had a Sony, 50″, rear projection monster of a TV that was just sat in the corner of the room like a mountain of plastic testosterone. Time to get shut, tidy things up and free some space up in the living room. Enter my new BenQ W700 projector.
Projector
I did a fair amount of shopping around as usual (being the “thrifty” kind of guy that I am) and found the guys at projectorshop24.co.uk to be the cheapest. I have ordered from projectorshop24 before when I purchased a projector for my work, so I knew what to expect – These guys are AMAZING! Their support team is second to none. I rang 3 times before committing to my purchase (I am the kind of customer that most call centres dread) with a varied number of questions on things like screen size, image quality, contrast values, output resolutions, noise levels and mounting brackets/fittings. They had all the answers and more. Other online venders take note.
In the running was: Optoma HD600X-LV, Acer H5360BD – Colorboost 3D and the BenQ W700. The price of the Optoma was sucking me in, but I was reluctant to fall vicim to that “I should have got the more expensive one” feeling 3 months later. On paper the Acer looks impressive but I was assured that the BenQ wouldn’t let me down as it had superior contrast features and I’m not that bothered about going 3D right now (The Acer is 3D ready out of the box whereas the BenQ has to be upgraded with extra hardware). So I departed with the extra £100 for peace of mind, and I am glad I did.
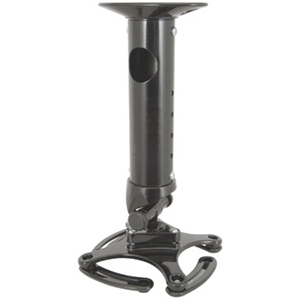
Ceiling Mount
Next up – all the bits and bobs. Projectorshop24 confessed to not being the cheapest for projector accessories, which is a shame as I would have loved to just order everything in one fell swoop. However, it’s well worth doing a bit of shopping around. I needed a ceiling mount that had a drop of 30cm to extend lower than the light fitting in my living room. I found this adjustable mount at yourspares.co.uk. It’s very versatile, with an optional extending pole that can be adjusted to a number of different drops heights, or simply fitted without for a flusher fitting.
My only issue with this mount is that it doesn’t hold the projector fast in the desired position very well. If you plan on touching the projector to switch it on or adjust the settings I would advise against this model as it will move out of position, however I will be operating mine from the remote, so for the price I can’t complain.
I nearly had kittens when shopping around for a suitable mount, some of the other prices are ridiculous. This one is tidy, cheap and adjustable, it’s just not rock solid at fixing the projector into position. No big deal for me.
Cables
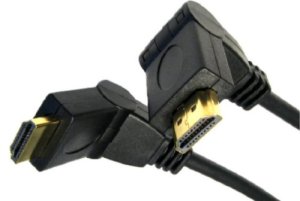
I ordered a 5m HDMI cable from Amazon. You could probably find it cheaper elsewhere but it had good reviews from a trusted seller. This cable has a 180 degree adjustable head at each end, a nice feature to have but it had me a bit worried when I ordered. I had visions of this being the cheapest piece of crap I had even seen, but the reviews were right, it’s great and so is the picture.
I was worried a HD image over 5 meters of cable might start to deteriorate, but apparently you can go over 15m before noticing any discernible difference.

Nothing to write home about regarding the 5m power lead – it does the job. I ordered one with a 90 degree head to try and tidy things up a bit at the back. My advice would be to try and imagine your potential set-up before buying and see where you would like things to go and how you would like them to look. Obvious I know but it helps with the minor things like this. Another thing that also helps is measuring up. There’s nothing worse than finding out your 30cm short with your 5m HDMI cable :/
On a completely unrelated note, if you need to order a 2M HDMI extension cable this one does the job 😉
Installation
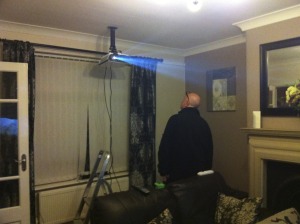 For my 5m’s worth of cabling I bought 3 x 2m runs of 16mm x 16mm self adhesive conduit from B&Q. Obviously you can get it cheaper elsewhere if you want to order it online, however I wanted to take the cable to the store to ensure I was getting the smallest trunking possible. The self-adhesive conduit is fine for lightweight cabling like this, however try not to detach it from the wall or ceiling once you have applied it as the adhesion is not the strongest.
I toyed with the idea of running the cable through the ceiling, however this would have been a massive pain as the joists in the ceiling where running in the wrong direction, meaning I would of had to make Swiss cheese out of my house 🙁
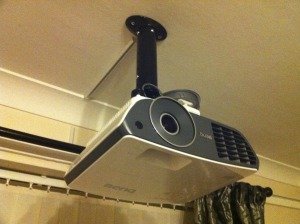 The ceiling mount was pretty straight forward to install. The hardest thing was finding where the joist was in the ceiling. I did this by taking the floorboards up in the room above and measure the relevant distances, then applied the measurements to the ceiling downstairs. This process would have been much easier if my stud detector hadn’t packed in.
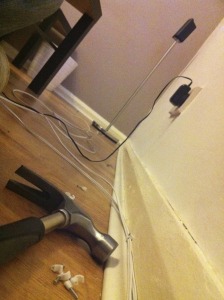
Next job was to rewire my 5.1 speaker system. From my old setup, the front was now the rear and the rear was now the front, not too much of a problem, just switching a few sockets at the back of the amp. However the centre speaker needed to be relocated to the other side of the room. This meant adding around 15m of additional speaker cable and tacking it around the perimeter of the room. Again, no big deal, just a small oversight I hadn’t even considered when ordering the projector. Lesson? Always plan ahead… properly!
Results
I plan on taking some proper (non iPhone) pictures and maybe some video footage for you to see, but take my word for it – it’s well worth the effort. I now have a 108″ HD image in my living room AND I’ve increase the amount of living space! All for the grand total of around £600. Not bad 😀
Video
Not the best video example but you get the idea:

 Just another blog from another rambling keyboard warrior.
Musings on film, music, media and other trivial but essential effects.
Feel free to take a mooch around and comment on how wrong you think I am, but please bear in mind my levels of dyslexia have reach an all new owl.