
So after last years Darth Maul costume fiasco, I embarked on something a bit simpler – a zombie costume. I was hoping that my zombie costume wouldn’t be as painstaking to prepare and wouldn’t take 6 hours in the makeup chair. So, here goes: This year’s new year’s eve fancy dress party theme was “computer games”, so whilst the topic was both vague and obvious, I wanted to go as something that I could make myself that wouldn’t end up looking too shoddy. This meant that the obvious candidates: Mario, Sonic and all the numerous Street Fighter characters were out for me. Also, being married now meant that we are a “team” so we embarked on an idea that both of us could do – enter a personal favourite of mine and all time classic “Resident Evil”. The mrs quite fancied going as the bad ass “Jill Valentine” and I liked the idea of a good old fashioned zombie. The idea was a goer.

Resident Evil’s Jill Valentine
On a side note, we assembled the Jill Valentine costume ourselves from bits and bobs on the internet, it’s no badass cosplay getup, but if I get time I’ll put together a blog on that costume as well.
My Zombie Costume Shopping List
Clothes:
- x1 old white shirt (one that you don’t mind destroying)
- x1 old pants/jeans (same as above)
- x1 pair of old shoes/trainers (same as above)
Makeup:
- Pale foundation (as pale as you can find)
- Red face paint
- Brown face paint
- Purple face paint
- Black face paint
- Red lipstick
- Liquid latex
- Tissues
Zombie Costume – DIY Fake Blood
Effects:
- Red food colouring
- Syrup
- Chocolate Sauce
- Flour/Cornflour
- Tea bags
- Coffee
- Shoe polish
Tools
- Makeup sponges
- Makeup brushes/Cotton buds
- Tweezers
- Scissors
- Knife
Extras
- White contact lenses
A lot of this stuff you will already probably have in your house. For the more bespoke stuff like the face paints and liquid latex, I got these from my local fancy dress shop: The Party Palace in Widnes.
Now to bring the Zombie to life
Ok, so that sounds like a lot once I’ve wrote it all down but most of it I already had in the house.
I’m going to reiterate what I said on my last costume by saying: I’m not a makeup artist or costume designer, I’m just doing this because I like these little projects. Everything I’m doing is based on other online tutorials or my own imagination. I’m also going to write this blog as and when I make the costume so you can get an idea of the various stages and through processes that went I to each part.
My Zombie Costume
I started off with my clothes. I just cut, ripped, stabbed, stained and basically destroyed my shirt, jeans and shoes. Firstly, I started by cutting a few holes and tears into the garments. I tried to make this look as natural and random as possible. On tip is to pull the scissors across the cut to fray the edges instead of making clean cuts. The key is roughness. Then with some black shoe polish I dirtied both garments up a bit to make them look like they’d been dragged through the streets. I also added some red face paint around the holes I’d made, to make them look like they we’re stained with blood by open wounds. The red is a bit bright but I’m going to fix that later.
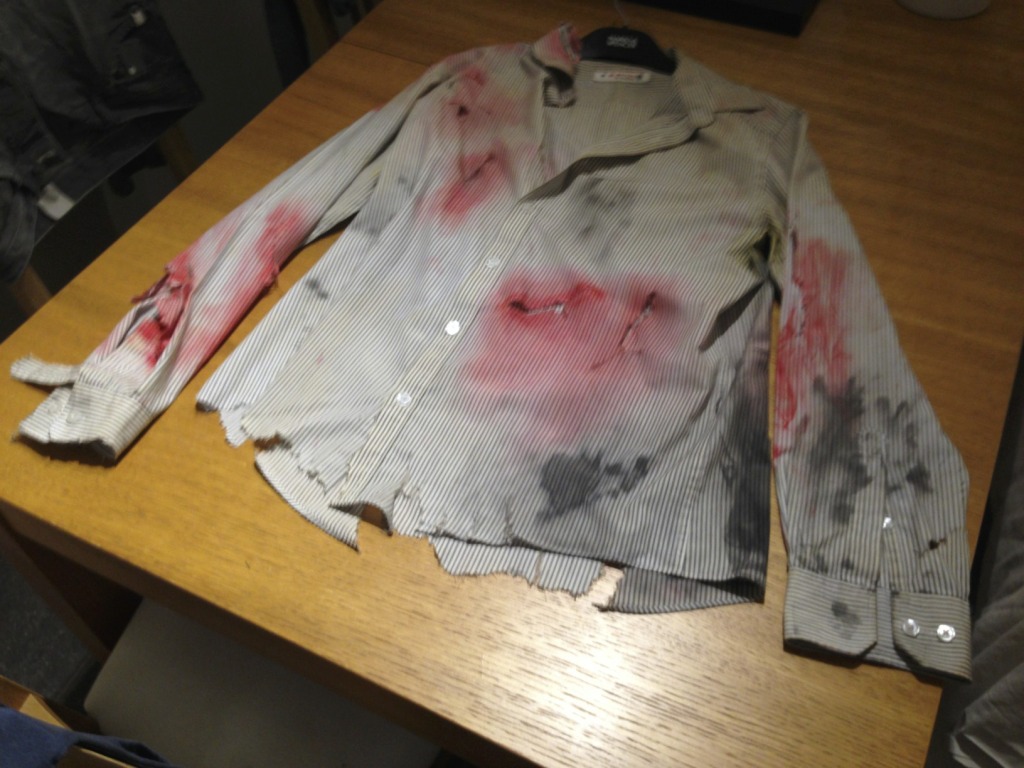
Zombie Costume Shirt – Ripped with Red paint and shoe polish
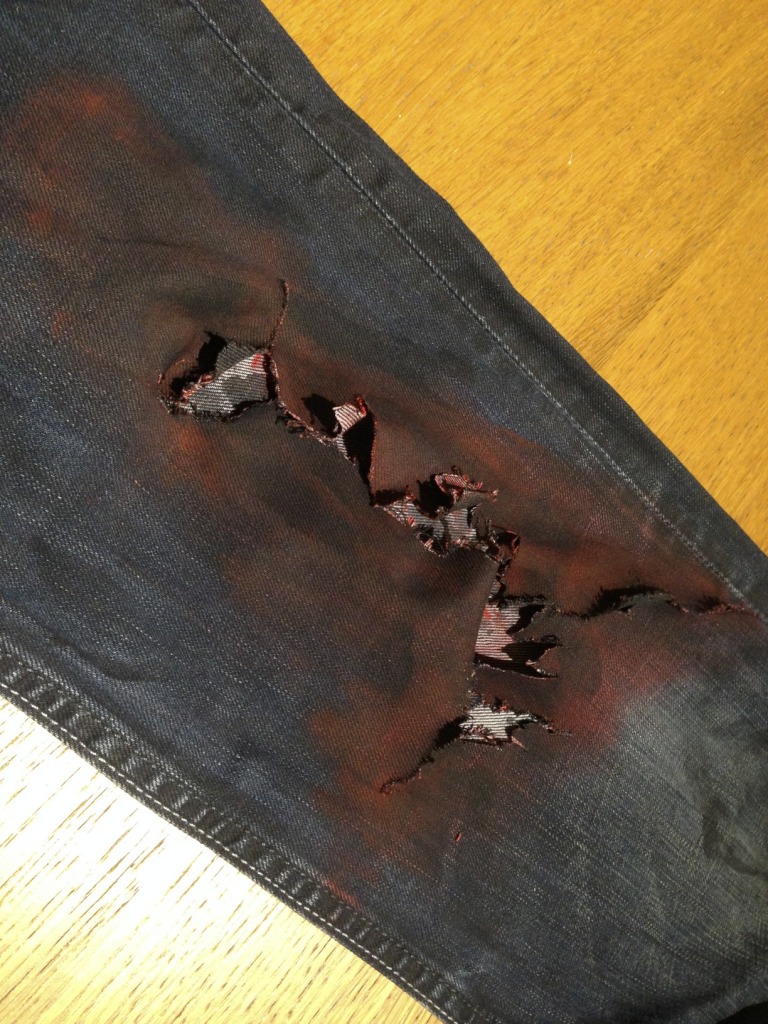
Zombie Costume Jeans – Ripped with Red paint and shoe polish
I then soiled the shirt with a thin liquid consisting of a tea and coffee mixture to give it a warn out, dirty kind of look. I put the mixture in a spray gun to get a random, uneven spread, but in hindsight I probably should’ve applied the stained base coat first.
Zombie Costume Dirty Shirt – Sprayed with tea and coffee
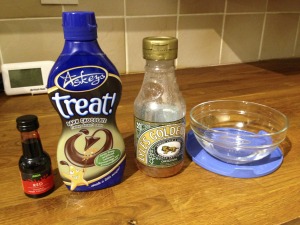
It’s hard to see in the picture but this step really does make all the difference. The red face paint I used on the shirt is called “bright red”, so on the clothes it looks a bit over the top for the effect I’m after. So I decided to try and stain the clothes with a darker, thicker, homemade blood substitute. I mixed some red food colouring with golden syrup and a splash of water (a lot of the online tutorials tell you to use corn syrup, which isn’t really available in the UK, so I just used regular golden syrup). This really was a trial and error sort of process, I ended up adding some cornflower into the mixture to thicken it up a bit and dull the redness of the food colouring. I also added the tiniest amount of chocolate syrup as well. For a first time effort it’s turned out ok to use on the clothes but I think I might make a different (thicker) batch for the face makeup.

Zombie Costume – DIY Fake Blood Results
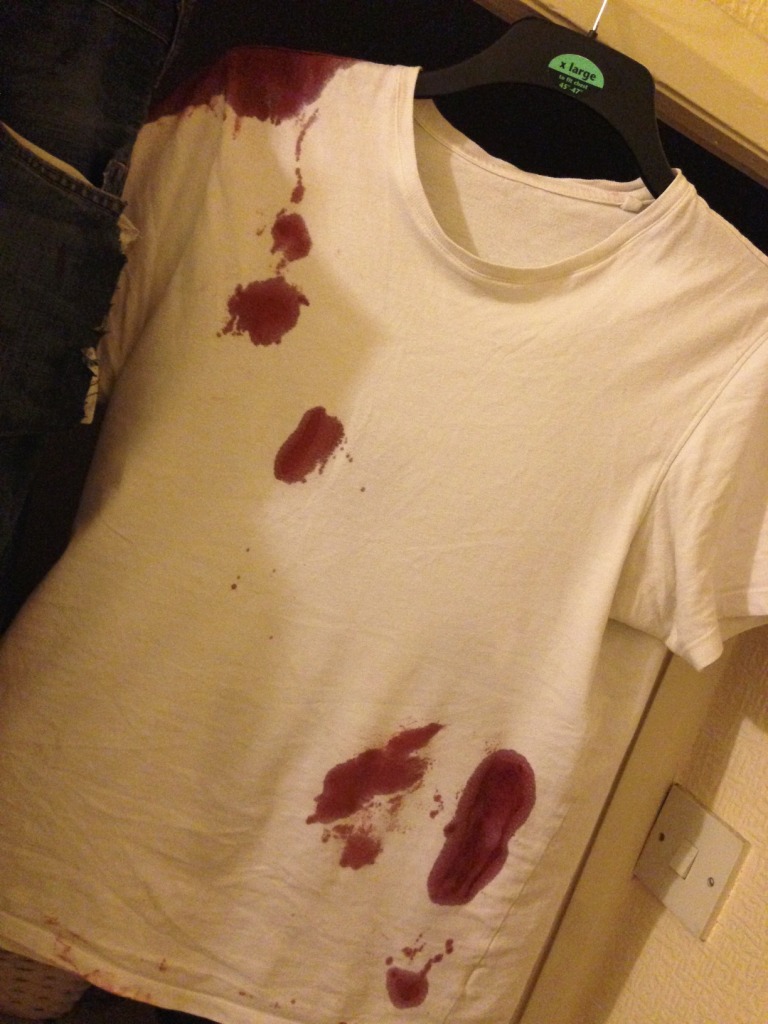
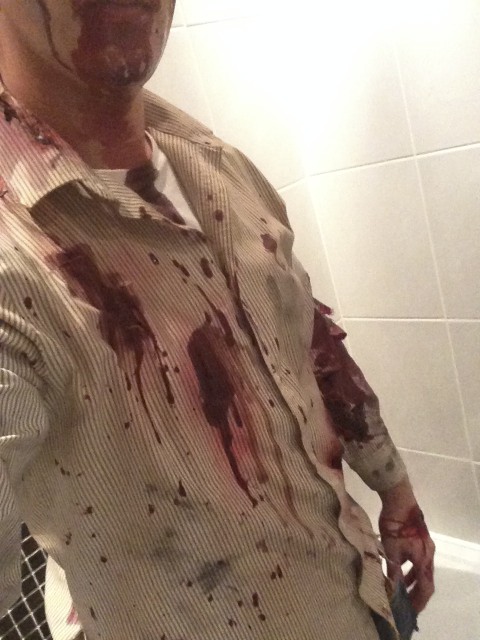
So to apply the blood to the costume I put the clothes on, got in the bath and used a small makeup sponge loaded with a generous amount of the blood and just basically splatted the areas with tears and cut so that gravity could do its work. I felt that trying to draw the blood on would end up looking fake so I just splashed it around and let it go where it wanted. I can’t recommend either getting the bath or going outsite to do this part:
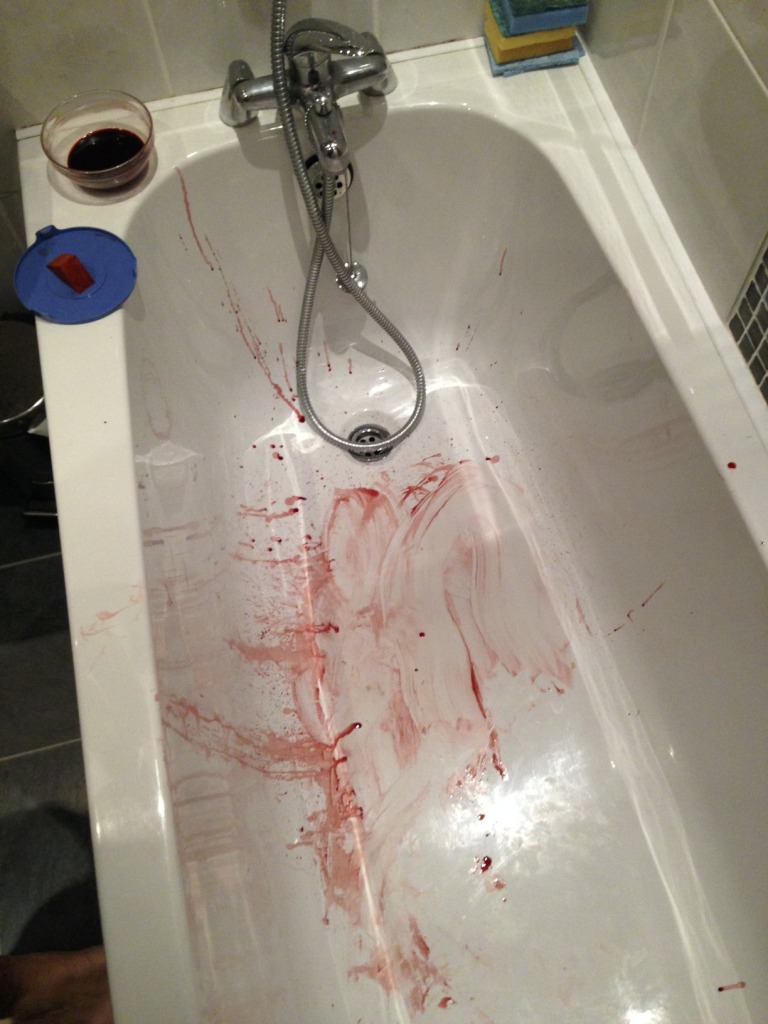
Zombie Costume Blood Bath
The results from adding this blood defiantly an improvement in my opinion, wether I add some more or not I’m still unsure. Once my DIY blood dried it started turning a slightly dark purple colour, which is kind of cool as it makes the blood look slightly “unusual”. I might return to this at some point.
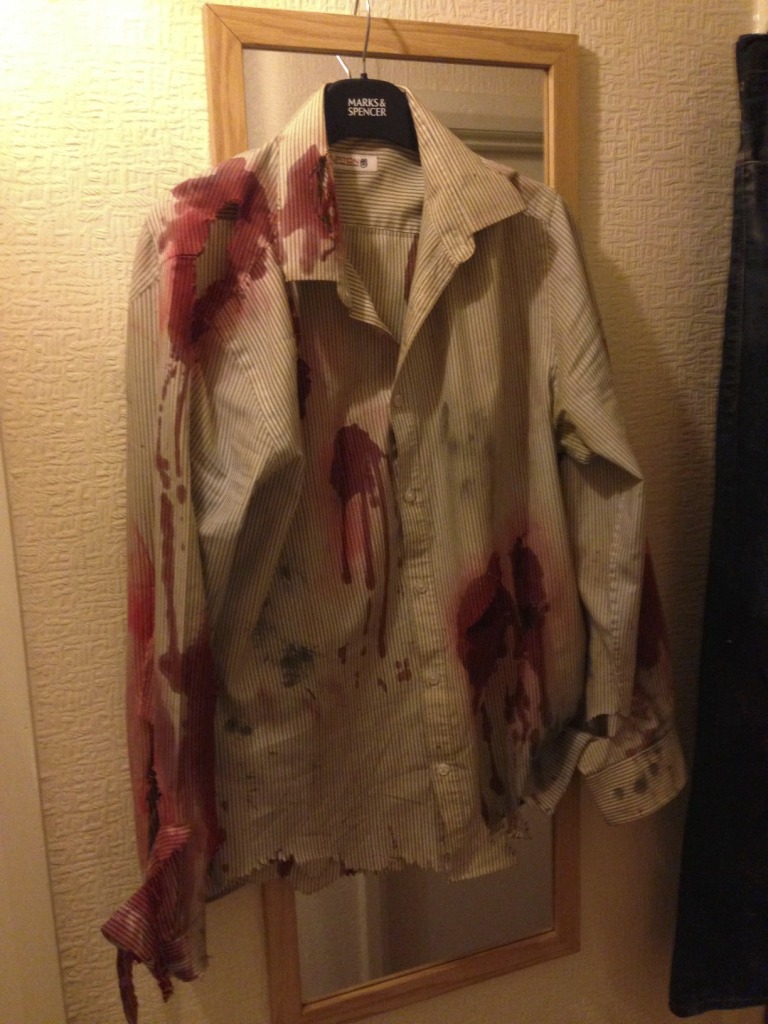
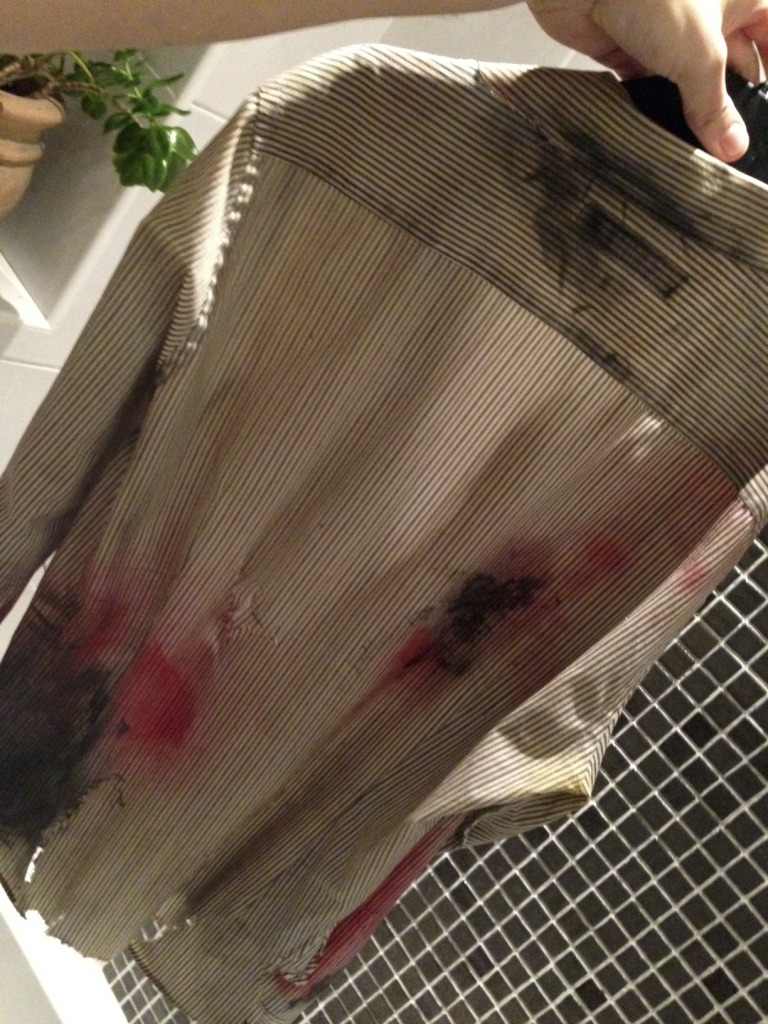
Zombie Costume Shirt with DIY Blood
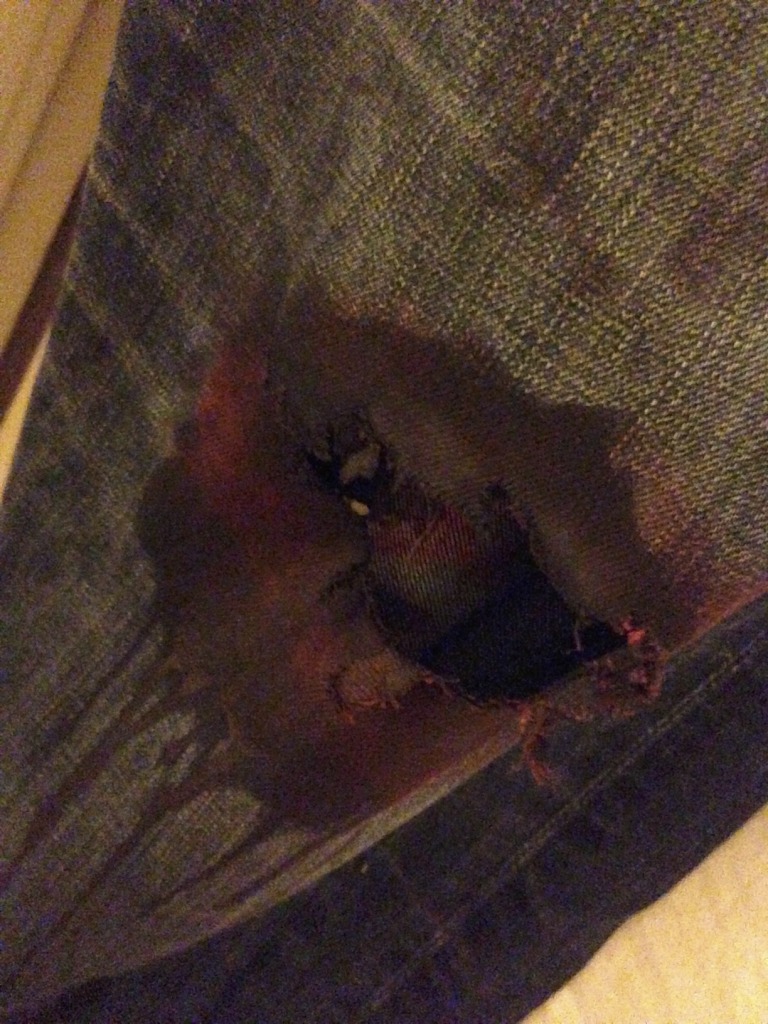
Zombie Costume Pants with DIY Blood
I also wore a plane white T-shirt underneath my outfit, which I will be wearing on the night, to avoid anyone have to accidentally see my hairy love rug and/or man nips. I might give this shirt the coffee and tea treatment as well to make it look more dirty and worn in.
Zombie Costume Undershirt
I had an pair of work shoes that were just about ready for the bin, so I decided to use them as they were already pretty beaten up. I took a knife to them to give them that extremely battered look.
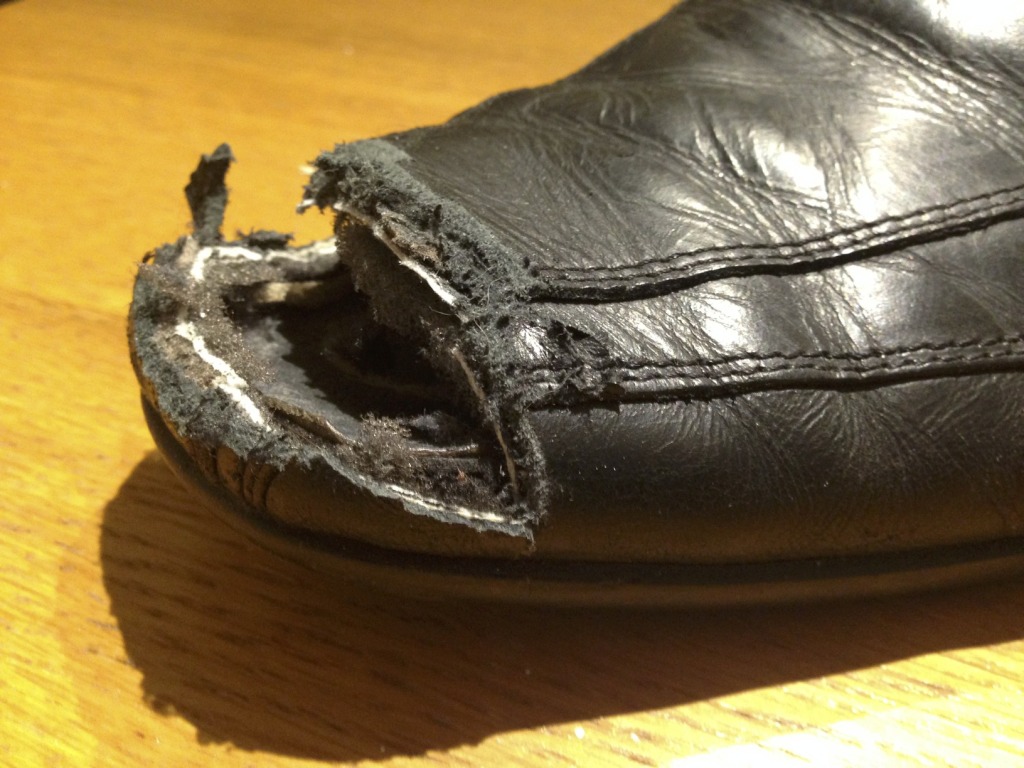
Zombie Costume Shoe – Toe chopped off with a knife
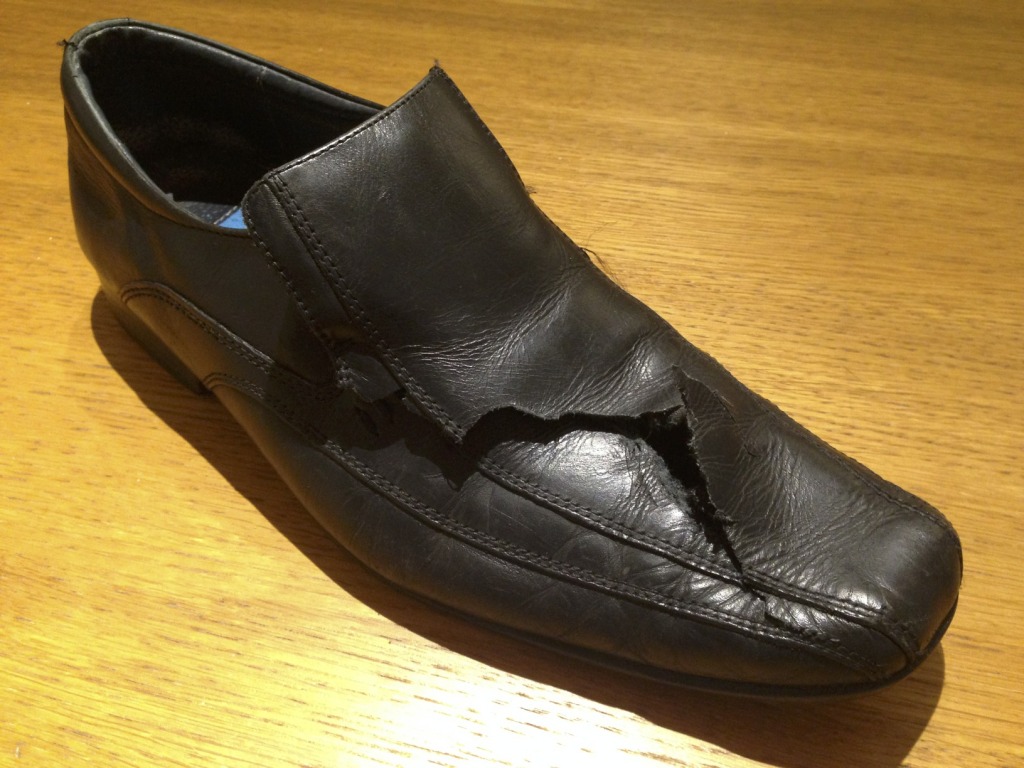
Zombie Costume Shoe – Ripped down the side
Zombie Costume Makeup
Next up was the makeup. This is basically everything I had to work with.
(Things I didn’t end up using here was the tooth enamel and the vampire blood)
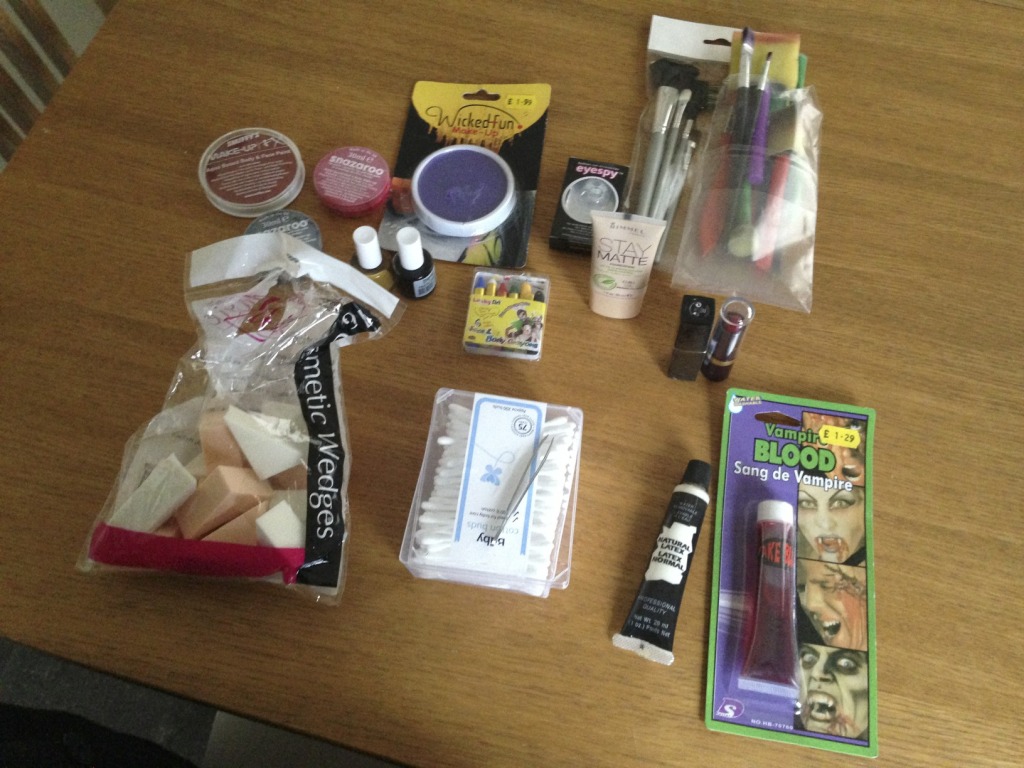
Zombie Costume Makeup Equipment
Zombie Hand Makeup
As I hadn’t used liquid latex to create a scar before I decided to do a little test on my hand to begin with. I decided that I was going to have a cut on my left hand so stage 1 was to put a layer of liquid latex on my hand and then cover it with pieces of 1 ply tissue paper.
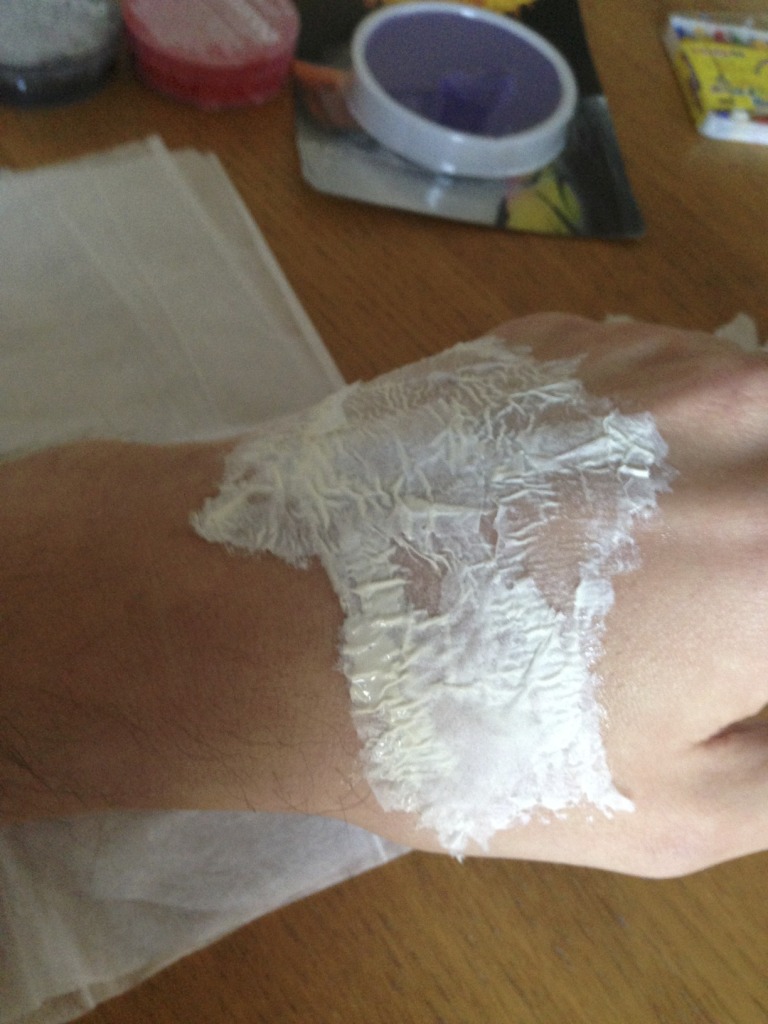
Zombie Hand – Stage 1
It’s worth pointing out before you start this process (on any part of the body) it’s a wise move to shave any areas with hair before you apply liquid latex to it. When applied like this, let’s just say “it’s not going to fall off”. You will need to pull at it and it hurts, so combined with hairs – you’re in for a “treat”.
Stage 2 is to build this up with a further 4 layers of latex and tissue. Working away from the edges so that the highest part is in the centre. This will make blending the edges into the skin easier and less obvious. Each layer will take around 10-15 minutes to dry. When you are happy start to make a hole in latex were you can work it outwards into whatever shape of wound you like. I used a pair of tweezers to do this but be careful not to turn your fake scar into a real one!
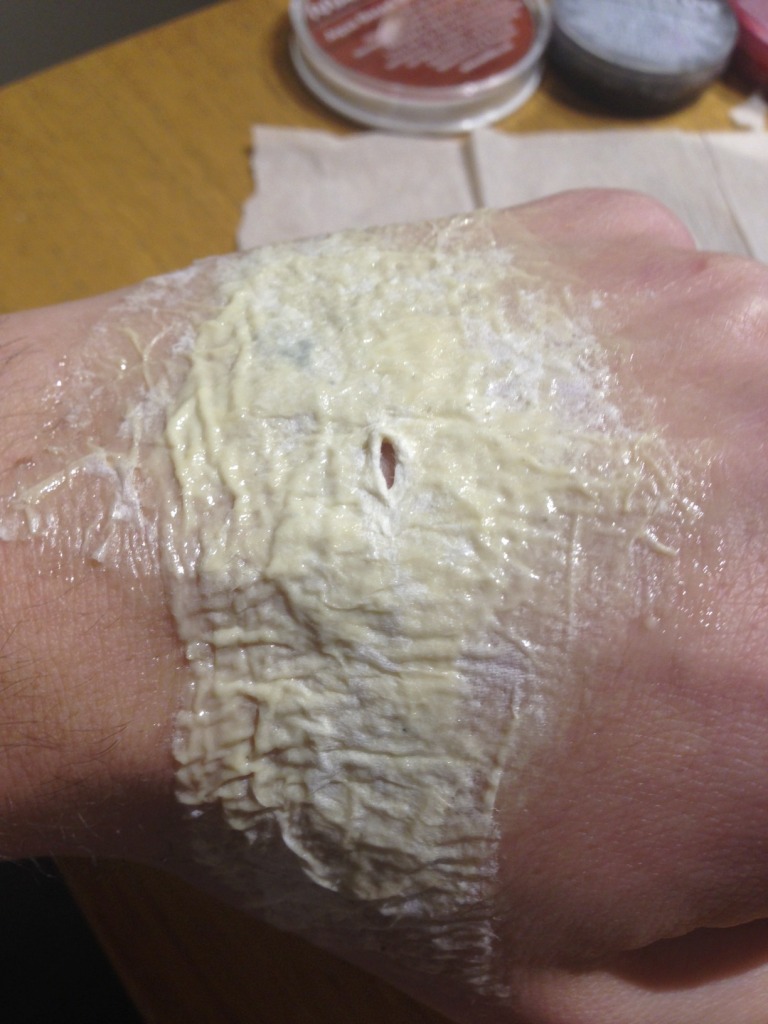
Zombie Hand – Stage 2
Stage 3 – Using a combination of the tweezers and your fingers, work the latex apart until you get the desired effect. Don’t worry about the latex not matching your skin colour, that’s the next step.
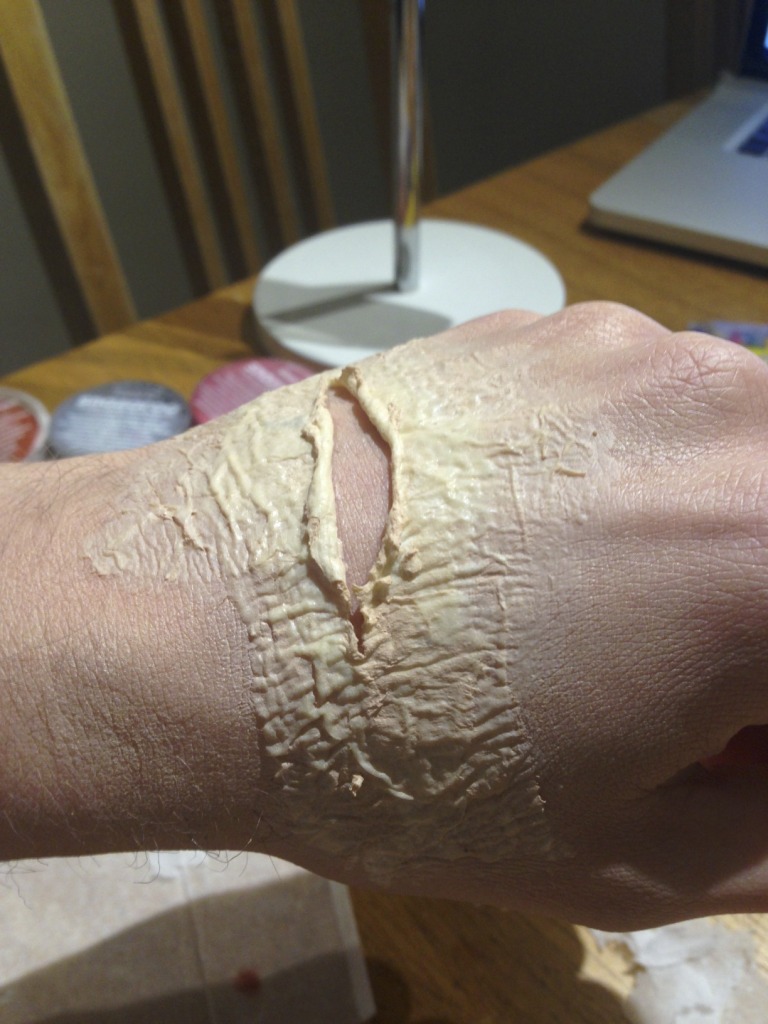
Zombie Hand – Stage 3
Stage 4 is colour. I used the lightest (and cheapest) liquid foundation I could find and sponged that all over the wound. Then I used my red face paint and brushed that into the centre and around the edges of the “broken” skin. I then added some purple to the surrounding edges of the scar to make it look extra sore and infected. On a side note – I picked up an oil based purple face paint which I wouldn’t really suggest buying. It’s not as easy to work with as water based paints. I had to use a cotton wool bud to apply it and it leaves a shine on your skin that wasn’t really appropriate for my zombie.

Zombie Hand – Stage 4
Stage 5 – I added more red on top of the purple and added some black to the inner edges of the scar to help make it look deep and old. I also used a combination of bright and deep red coloured lipsticks to brush in some different shades of red on the inside of the wound.
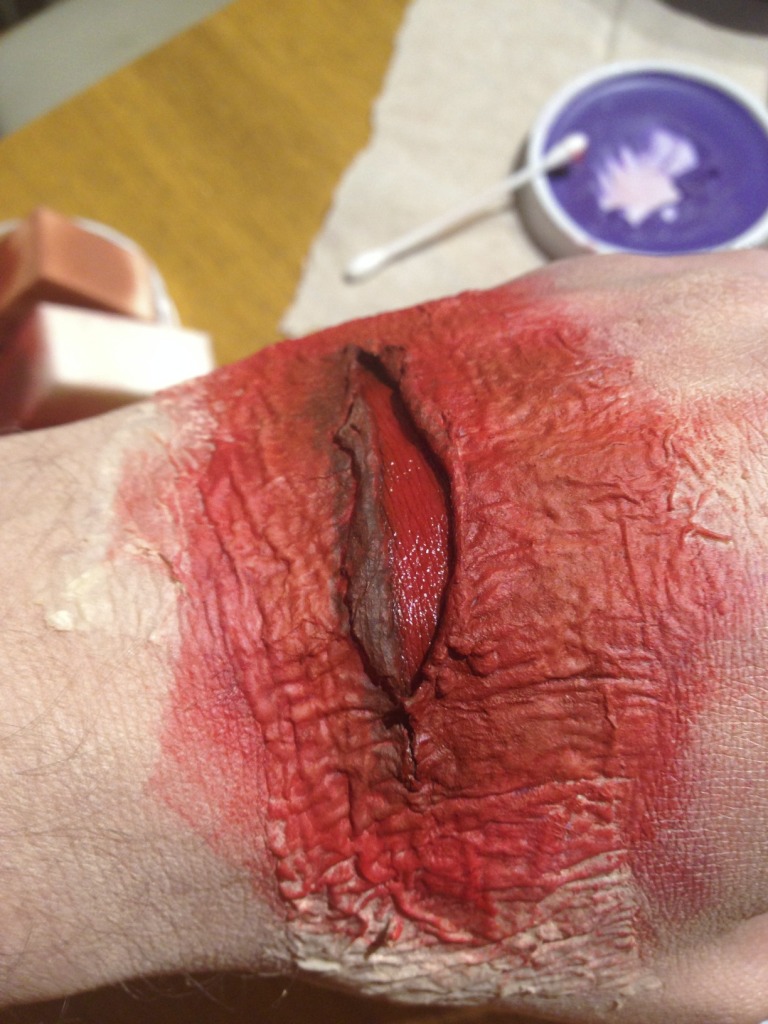
Zombie Hand – Stage 5
Now that I was happy with this the next stage was to add the blood, but as this is really messy I left it until the very end and moved onto my face makeup.
Zombie Face Makeup
So, I wont go over the details but basically I repeated what I had learn’t in the steps above and created 2 different wounds on my face:
Note: Before you start applying face makeup, I strongly advise that if you are going to wear contact lenses, you should put them in before you starting getting makeup and face paints everywhere (unlike me!). This will not only help prevent you ruining your work but will also help prevent you from getting all kinds of junk in your eyes. Make sure your hands and lenses are clean!
Stage 1
[column-group]
[column]1 layer of latex + tissue paper[/column]
[column]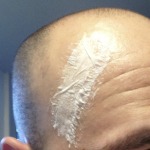 [/column]
[column]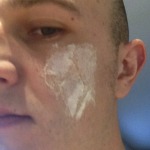 [/column]
[/column-group]
Stage 2
[column-group]
[column]3 layers of latex + tissue paper[/column]
[column]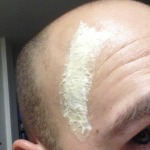 [/column]
[column]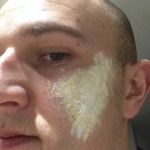 [/column]
[/column-group]
Stage 3
[column-group]
[column]5 layers of latex + tissue paper[/column]
[column]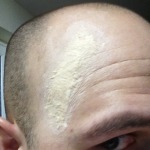 [/column]
[column]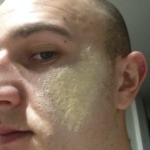 [/column]
[/column-group]
Before the next steps, I’d advise that you work on the general base layer for your whole face at this stage. I started off by adding some brown and purple splodges all over my face. These might look a bit random and not very “zombie” like at this stage but these will eventually appear underneath the skin and give an extra depth to the over look.

Zombie Costume Makeup – Skin Stage 1
Next, add the liquid foundation all over your face and any other visible areas that you want to appear pale and lifeless. This process will help to blend the edges of the latex in to give them a more realistic look. Now you can see the brown and purple colour is much less prominent.

Zombie Costume Makeup – Skin Stage 2
While I was working on my skin I decided to do some work on my eyes. As mentioned above, get your contact lenses in as early as possible, don’t leave them until not (like I did!).
I started by adding some brown and red facepaints around the general eye socket area as a sort of dark base.
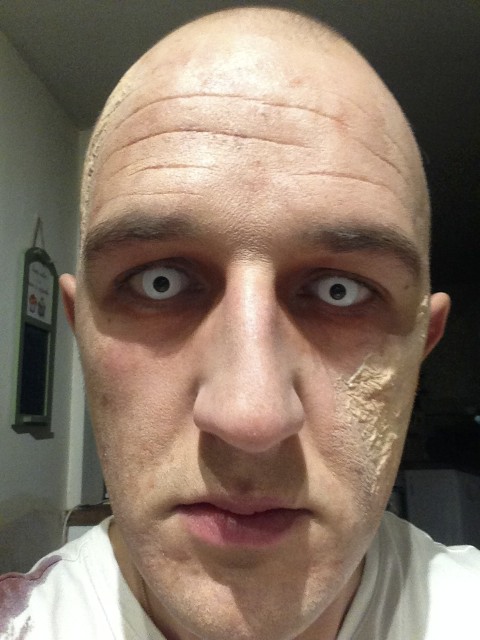
Zombie Costume Makeup -Eyes Stage 1
Then with a sponge or brush just blend those colours out to make it look more natural. I added some bright red lipstick to my eyelids to make my eyes look extra sore (the contact lenses also helped me achieve this look as I’m not used to wearing them – ouch).
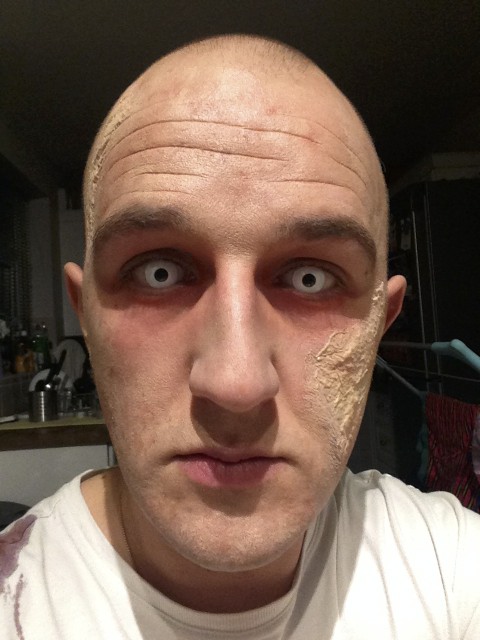
Zombie Costume Makeup -Eyes Stage 2
Next, I added some black detail on the inside of the bridge of my nose and to the bags under my eyes to make my eyes look really deep set and sunken in. While I was at it, I added some black to emphasise the cheekbone, temples, nasal lines and brow lines. Remember to blend this in using a sponge or brush.

Zombie Costume Makeup -Eyes Stage 3
Blend, blend, blend. Even if you think you’ve overdone it, just blend it out and add some more foundation. Lots of thin layers are better than one or 2 thick layers. Be patient and build your look up gradually.
Zombie Costume Makeup -Eyes Stage 4
Back to the face scars…
Stage 4
[column-group]
[column]Cut/Rip/Pull latex as required[/column]
[column]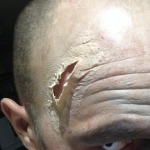 [/column]
[column]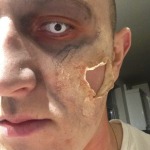 [/column]
[/column-group]
Stage 5
[column-group]
[column]Apply red base colour[/column]
[column]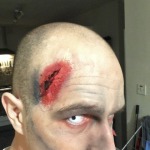 [/column]
[column]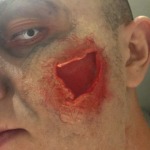 [/column]
[/column-group]
Stage 6
[column-group]
[column]Apply black around inner edge[/column]
[column]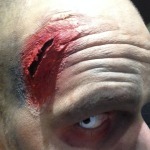 [/column]
[column]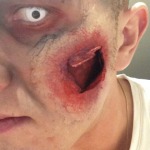 [/column]
[/column-group]
Zombie Costume – Blood
You should now be just about ready to apply the blood. I mixed a second lot of blood up for my wounds and face using just chocolate sauce and red food colouring.
The basic rule here is pile it on and let gravity take it’s course. Put your costume clothes on, go outside or in the bath/shower and don’t worry about making a mess or getting everywhere, you’re a zombie after all!

Zombie Costume Makeup – Blood
I used a cotton wool bud and my fingers to apply the blood and let it drip everywhere for a realistic look.
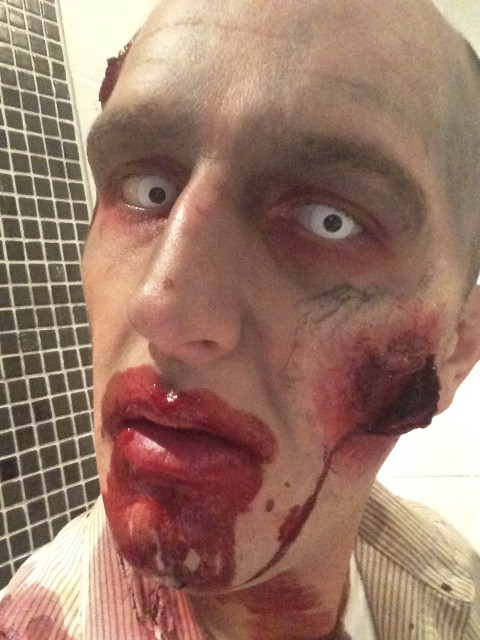
Zombie Costume Makeup – Blood
Don’t worry about it getting everywhere!
Zombie Costume Makeup – Blood
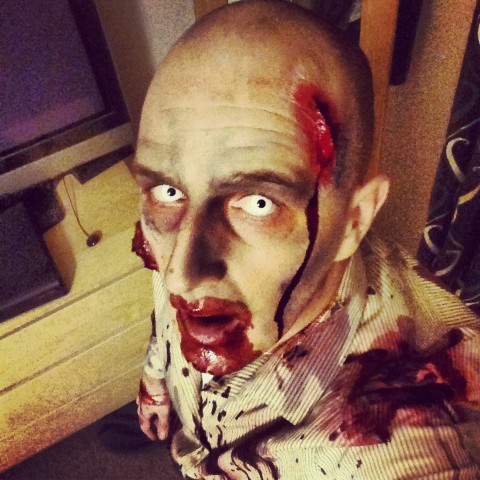
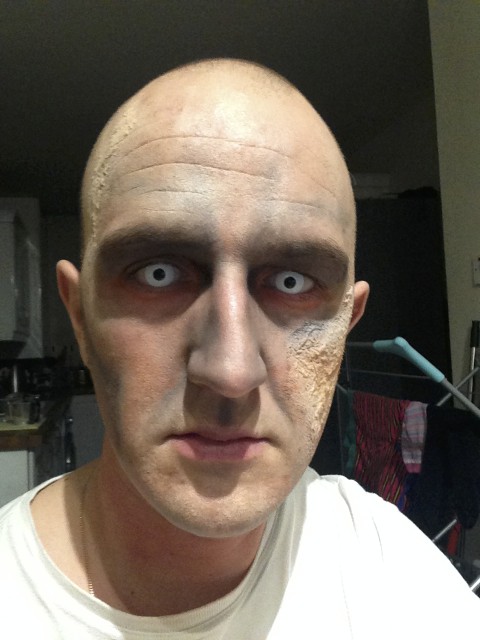
My Zombie Costume (+ Jill Valentine)
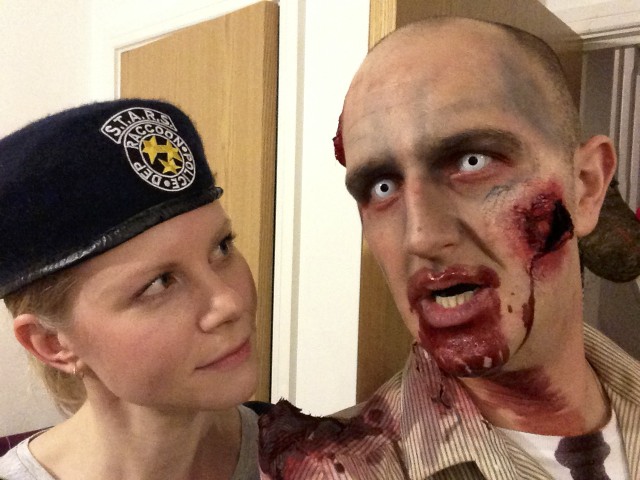
Resident Evil Zombie + Jill Valentine
Total time to apply = Around 2-3 hours of concentration.
Total time to remove = 15 minutes of agony:
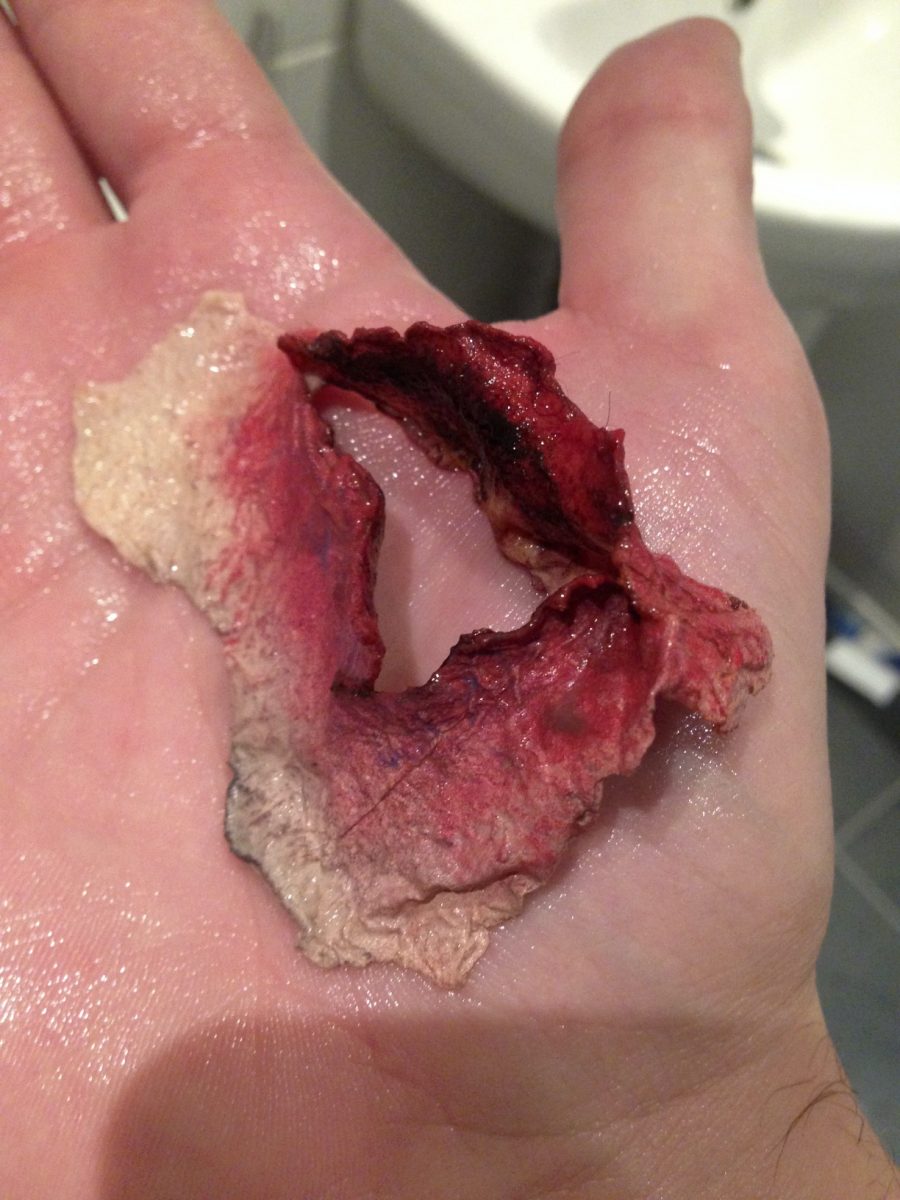
Zombie Cure
If you end up making your own version please post some links and comments below.
 Just another blog from another rambling keyboard warrior.
Musings on film, music, media and other trivial but essential effects.
Feel free to take a mooch around and comment on how wrong you think I am, but please bear in mind my levels of dyslexia have reach an all new owl.
Just another blog from another rambling keyboard warrior.
Musings on film, music, media and other trivial but essential effects.
Feel free to take a mooch around and comment on how wrong you think I am, but please bear in mind my levels of dyslexia have reach an all new owl.